
Build a Shopify App with Rails and Hotwire
I’m very grateful for Shopify and all that it has given to the Rails community over the years. Shopify is a Rails application after all. When I ran a consulting firm, clients would sometimes raise the question about Rails’ performance history. My go-to response was “Shopify runs on Rails” so what performance issues?
It’s a wonderful platform that has provided a clear and straightforward path for millions of business owners to sell their goods and services online. They have provided countless hours back to the Ruby community. In addition to the platform, they have a vibrant app store, which brings me to this post. We’re going to build a simple Shopify app using Rails, Hotwire, and ViewComponents.
In this post, we’re going to use the following tools and resources:
- Shopify’s shopify_app gem
- Ruby on Rails with Hotwire
- View Components
- Shopify Polaris
- ngrok
Getting setup
The basic concept of a Shopify App, is that it’s essentially a full blown web application running inside the Shopify platform. Hence why it’s a called an ‘app’ and not a plugin. This means our app will need to be hosted somewhere on the Internet in order for Shopify to interface with it. We can use a service like Heroku, but we don’t want to have to push updates to the server in development mode. Instead, we’re going to setup ngrok to tunnel traffic from Shopify to our application running locally.
I recommend signing up for ngrok’s basic plan that allows you to setup a custom subdomain such as “shopifyhotwireapp.ngrok.io” that I’m going to use for demo purposes. This will come in handy once we start developing the app by having a consistent endpoint for Shopify to interface with. Once we have our Rails app up and running locally on port 3000, we can run ngrok and give your custom subdomain along with the port number to forward traffic, in my case, my laptop.
ngrok http -subdomain=shopifyhotwireapp 3000
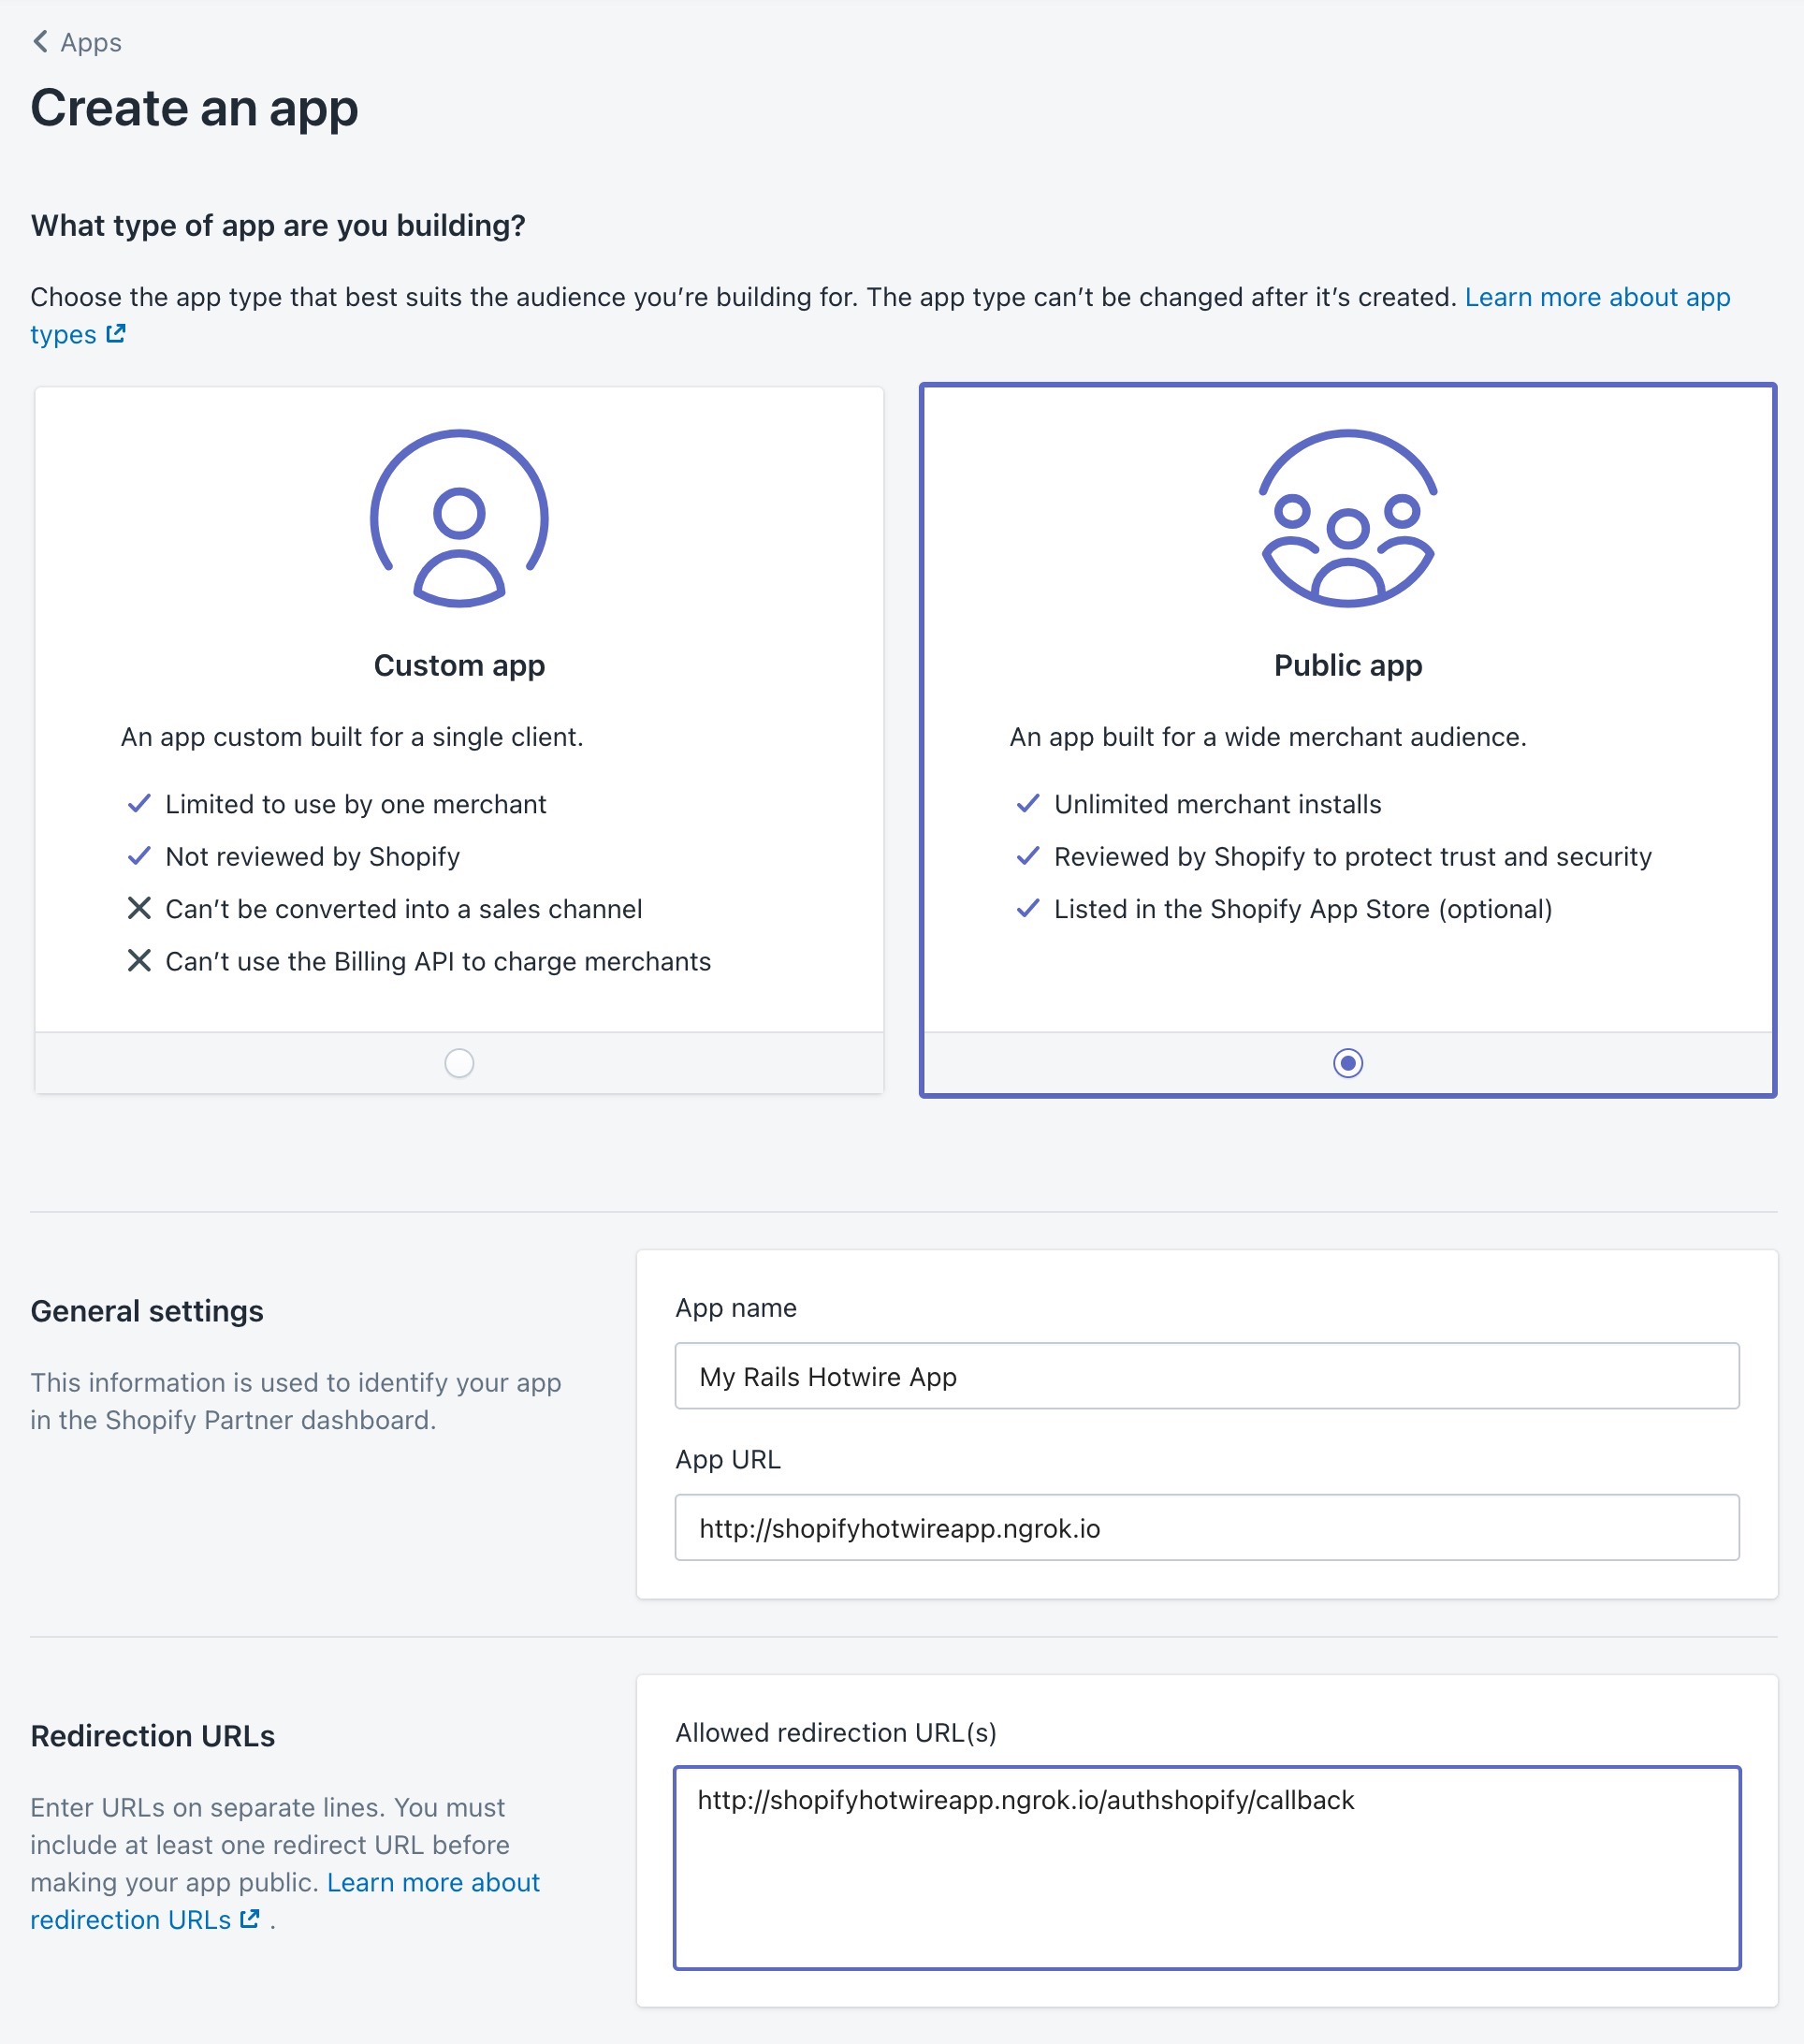
Now we need to register an app on Shopify. Assuming you have a partner’s account on Shopify, we can easily create a new application from the partners dashboard page. For this post, we’re going to create a new app call “My Rails Hotwire App”. Here is where we will add the redirection url that we specified in our ngrok command above. This is where Shopify will load our app from and send requests to.
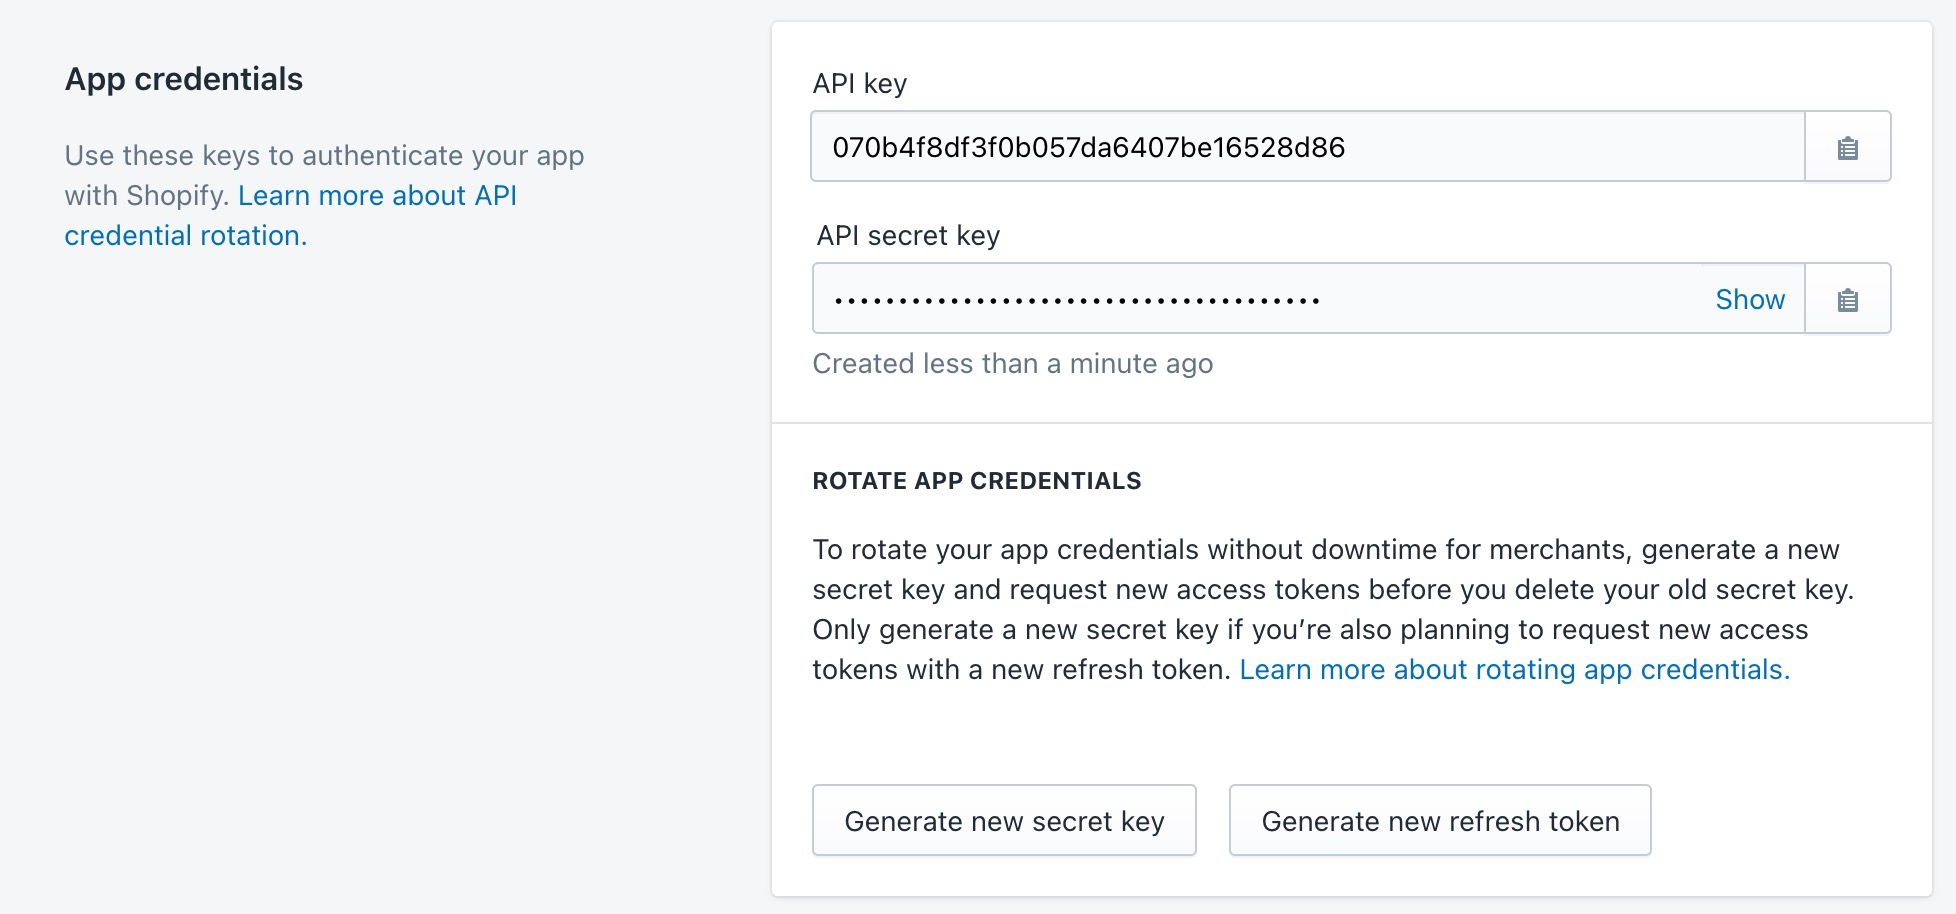
Now we have our credentials for Shopify’s API that we’ll need for our new Rails application. Similar to Shopify’s own documentation, we’ll create a new Rails app:
rails new shopify-hotwire
cd shopify-hotwire
Plug in our new API credentials in the .env file.
SHOPIFY_API_KEY=xxx...
SHOPIFY_API_SECRET=yyy...
Now add the shopify_app gem
gem 'shopify_app', '~> 18.0.2'
Using the shopify_app gem, we’ll generate a new Shopify app
bundle install
...

rails generate shopify_app
...

# Create new 'shops' table to store information about the shops using the app
rails db:migrate
The shopify_app gem gives us a few good tools to get us started. Most notably
it provides the code required to implement OAuth with Shopify so we don’t have
to worry about doing that work on the back-end. To authenticate with Shopify, we’re using Shopify’s App
Bridge using session
tokens on the client-side using Javascript. More on this a little later.
Shopify has documentation on how to do this with Turbolinks, but we’re going to use Turbo instead and so I’ve taken their examples on Turbolinks and modified it. The same concept applies - we’re using client-side code to create session tokens that will authenticate requests.
When we ran rails generate shopify_app earlier, the generator producted a few
Javascript files for us. The most important one is shopify_app.js, this is
where we’ll make some adjustments. But first, let’s install Turbo.
Installing Turbo
The JavaScript for Turbo can either be run through the asset pipeline, which is included with the gem, or through the package that lives on NPM, through Webpacker. We’re going to use Webpacker so let’s add that to the Gemfile along with turbo-rails too.
# Gemfile

gem 'webpacker', '~> 5.0'
gem 'turbo-rails'
Install turbo in our rails app:
bundle install

rails turbo:install
Now that we have webpacker up and running Turbo, we’re going to remove turbolinks and add Stimulus, Shopify’s Bridge Utils, and Polaris libraries.
yarn remove turbolinks
yarn add stimulus
yarn add @shopify/app-bridge-utils
yarn add @shopify/polaris
Again, I’m following Shopify’s example on how to create an embedded app using Rails and Turbolinks, but using Turbo instead. In their example, they create a Splash page first. The purpose of a splash page is to fetch a token from Shopify so that we have a token to authenticate the rest of the session. Once a token is retrieved, the page is directed to the main home page where our app comes to life.
rails generate controller splash_page index
Make the splash page the default page so this is the first page the user sees.
# routes.rb

Rails.application.routes.draw do
  root to: 'splash_page#index'
  ...
end
Much like the Home controller that shopify_app generated for us, we include a
few modules to give us the resources we need for our app to communicate with the
shops.
# app/controllers/splash_controller.rb

class SplashPageController < ApplicationController
  include ShopifyApp::EmbeddedApp
  include ShopifyApp::RequireKnownShop
  include ShopifyApp::ShopAccessScopesVerification

  def index
    @shop_origin = current_shopify_domain
  end
end
Updating shopify_app.js for Turbo
Now it’s time to update shopify_app.js so that each fetch to our Rails
application has a session token included for every request to the server. The
code included in the shopify_app engine will look for the token in the
Authorization header and verify the token is legit.
//app/javascript/shopify_app/shopify_app.js

import { Turbo } from "@hotwired/turbo-rails";
import { getSessionToken } from "@shopify/app-bridge-utils";
import createApp from '@shopify/app-bridge';

const SESSION_TOKEN_REFRESH_INTERVAL = 2000; // Request a new token every 2s

window.Turbo = Turbo
Turbo.start();

function redirectThroughTurbolinks(isInitialRedirect = false) {
  var data = document.getElementById("shopify-app-init").dataset;
  var validLoadPath = data && data.loadPath;
  var shouldRedirect = false;

  switch (isInitialRedirect) {
  case true:
    shouldRedirect = validLoadPath;
    break;
  case false:
    shouldRedirect = validLoadPath && data.loadPath !== "/home"
    break;
  }

  if (shouldRedirect) {
    Turbo.visit(data.loadPath);
  }
}

async function retrieveToken() {
  window.sessionToken = await getSessionToken(window.app);
}

function keepRetrievingToken() {
  setInterval(() => {
    retrieveToken(window.app);
  }, SESSION_TOKEN_REFRESH_INTERVAL);
}

document.addEventListener("turbo:load", async () => {
  redirectThroughTurbolinks();
});

// Append Shopify's JWT to every Turbo request
document.addEventListener('turbo:before-fetch-request', async (event) => {
  event.preventDefault()
  event.detail.fetchOptions.headers['Authorization'] = `Bearer ${window.sessionToken}`
  event.detail.resume()
})

document.addEventListener('DOMContentLoaded', async () => {
  // This is included in embedded_app.html.erb
  var data = document.getElementById('shopify-app-init').dataset;
  var AppBridge = window['app-bridge'];
  var createApp = AppBridge.default;

  window.app = createApp({
    apiKey: data.apiKey,
    host: data.host,
  });

  // Wait for a session token before trying to load an authenticated page
  await retrieveToken();

  // Keep retrieving a session token periodically
  keepRetrievingToken();

  // Redirect to the requested page when DOM loads
  var isInitialRedirect = true;

  redirectThroughTurbolinks(isInitialRedirect);
});
In order to make sure our token is legit, we need to continuously fetch the token to make sure it’s up-to-date. Not a great solution, but it’s one that Shopify recommends in their post so will go with this for now.
One thing we should add to our AuthorizedController controller (generated for
us by shopify_app) is the ShopifyApp::EnsureAuthenticatedLinks module from
the shopify_app gem. This will ensure every request is authenticated with
Shopify’s API. It does this by checking the session token exists and is
up-to-date.
# app/controllers/authenticated_controller

class AuthenticatedController < ApplicationController
  include ShopifyApp::EnsureAuthenticatedLinks
  include ShopifyApp::Authenticated

  before_action :set_shop_origin

  private

  def set_shop_origin
    @shop_origin = current_shopify_domain
  end
end
Setting up the views
Alright, at the point we should have our rails application up and running locally with ngrok setup to point to https://shopifyhotwireapp.ngrok.io and we have a Shopify app registered to use this web address for our app. In addition, we have javascript code setup to get a fresh session token from the Shopify API and adding it to our request headers so our rails application can authenticate our API credentials.
To make our app look native to Shopiy’s admin panel, we’re going to use Polaris. Polaris is a collection guidelines, CSS and html snippets provided by Shopify to help us give our app a more consistent look. Shout out to BAO Agency for creating a set of View Components that we can easily drop into our ERBs. These view compentns mirror the html snippets that Shopify provides, but as a view component instead. Let’s install it.
Add polaris_view_components to our Gemfile and run the installer.
rails generate polaris_view_components:install
Setup Polaris styles in your layouts <head> tag in the embedded_app.html.erb
<!-- app/views/layouts/embedded_app.html.erb -->
<!DOCTYPE html>
<html lang="en">
  <head>
    <meta charset="utf-8" />
    <% application_name = ShopifyApp.configuration.application_name %>
    <title>
      <%= application_name %>
    </title>
    <%= stylesheet_link_tag 'polaris_view_components' %>
    <%= javascript_pack_tag 'application' %>
    <%= stylesheet_link_tag 'application' %>
    <%= csrf_meta_tags %>
  </head>

  <body style="<%= polaris_body_styles %>">
    <div class="app-wrapper">
      <div class="app-content">
        <main role="main">
          <%= yield %>
        </main>
      </div>
    </div>

    <%= render 'layouts/flash_messages' %>

    <script src="https://unpkg.com/@shopify/app-bridge@2"></script>

    <%= content_tag(:div, nil,
                    id: 'shopify-app-init',
                    data: {
                      api_key: ShopifyApp.configuration.api_key,
                      shop_origin: @shop_origin || (@current_shopify_session.domain if @current_shopify_session),
                      host: @host,
                      load_path: params[:return_to] || home_path,
                      debug: Rails.env.development?
                    } ) %>

    <% if content_for?(:javascript) %>
      <div id="ContentForJavascript" data-turbolinks-temporary>
        <%= yield :javascript %>
      </div>
    <% end %>
  </body>
</html>
Install NPM package:
yarn add polaris-view-components
Finally, register the polaris controllers to index.js.
// app/javascript/controllers/index.js
import { registerPolarisControllers } from "polaris-view-components"
registerPolarisControllers(application)
Now let’s update the Splash page with a skeleton loader to indicate to the user that the app is loading. Note, I’m also using TailwindCSS to help with the layout.
<!-- app/views/splash_page/index.html.erb -->
<div class="h-screen max-w-5xl mx-auto">
  <div class="w-full mx-auto">
    <ul role="list" class="mt-44 grid gap-x-16 gap-y-16">
      <li>
        <%= polaris_skeleton_body_text %>
      </li>
      <li>
        <%= polaris_skeleton_body_text %>
      </li>
      <li>
        <%= polaris_skeleton_body_text %>
      </li>
    </ul>
  </div>
</div>
Let’s take a look in the browser.
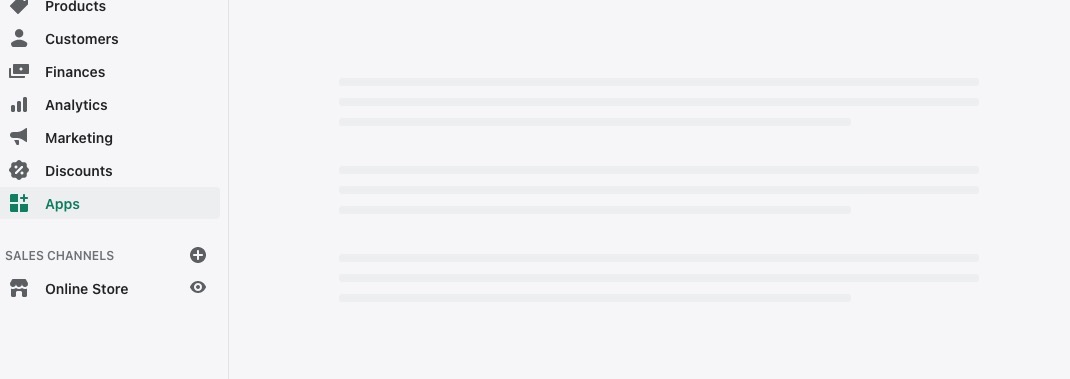
We should only see the splash page for a split second, then it redirects to the home page. By then, we should have a session token created and being refreshed every two seconds. On the home page, we’ll create a quick email subscriber form using Turbo to replace the contents of the turbo frame after the form is submitted.
<!-- app/views/home/index.html.erb -->
<%= polaris_page(title: "Welcome to my Shopify app built with Rails and Turbo") do |page| %>
  <%= polaris_card(classes: "m-0 shadow-sm border-b border-t rounded-none") do |card| %>
    <%= turbo_frame_tag :subscribe do %>
      <%= form_with(model: @subscriber) do |f| %>
        <%= polaris_form_layout do |form_layout| %>
          <% form_layout.item do %>
            <%= polaris_text_field(name: :email, form: f, placeholder: "matt@example.com") %>
          <% end %>
          <% form_layout.item do %>
            <%= polaris_button(primary: true, submit: true) { "Subscribe" } %>
          <% end %>
        <% end %>
      <% end %>
    <% end %>
  <% end %>
<% end %>
And finally, the create action will update the turbo frame on the home with a
small thank you message. If all works well, the form will be submitted to the
server and it will include our session token in the headers placed by the
turbo:before-fetch-request event fired when the form is submitted via
Turbo. The server will authenticate the token thanks to the modules inluded in
the shopify_app gem and return a successful response.
<!-- app/views/subscribers/create.turbo_stream.erb -->
<%= turbo_stream.update :subscribe do  %>
  <p>Thanks for subscribing!</p>
<% end %>
And there you have it. We have a Shopify app built with Ruby on Rails, Hotwire sprinkled with view components and TailwindCSS. In this simple example, we collected an email address from a subscriber and rendered a thank you message without redirecting or reloading the page and all without any custom Javascript!